Making a Pull Request
Overview
Teaching: 10 min
Exercises: 10 minQuestions
How can I collaborate on a project using Git?
What is a remote repository?
How can I collaborate if I don’t have write access?
What files should I edit in a Carpentries lesson repo?
How can I preview my changes?
Objectives
Understand how to collaborate using forks and pull requests
Know which markdown files you should edit
Be able to build the website locally
Collaborating using Git
With push access to the repo
Consider a small group of developers collaborating on a Git project. They each clone a copy of the git repo (e.g. from GitHub) and can push their local changes back to the remote repo. They can keep their repos up-to-date by pulling remote changes into their local repos.

This model works well if all the developers trust that each others’ changes match the same vision of the project, and will improve the project. This workflow is typical within a company.
For larger open-source projects, it’s generally desirable to have a small number of maintainers who control what changes are made to a repo. They don’t necessarily make all the changes, but guide the direction of the project. Maintainers are like the developers in the previous diagram in that they have write access to the repo.
Without push access to the repo
So how can you contribute to a project where you don’t have push access?
The first step is to make a fork (i.e. a copy) of the repo into your own account on GitHub.
Look for the fork button on the repo you want to copy:

A fork is a git clone on GitHub’s servers from one account into another.
You can then use your fork like any other repo that you own.
Next, you git clone your newly forked repository (i.e. the copy in your GitHub account).
Checkout a new feature branch for your changes, and make your commits.
Push these changes back to origin, which is your forked copy of the repo.
Now you can request that the maintainer of the lesson merge your feature branch into the main lesson’s branch.
This is called a pull request (PR) and is initiated using GitHub — look for the green button
like in the example below:
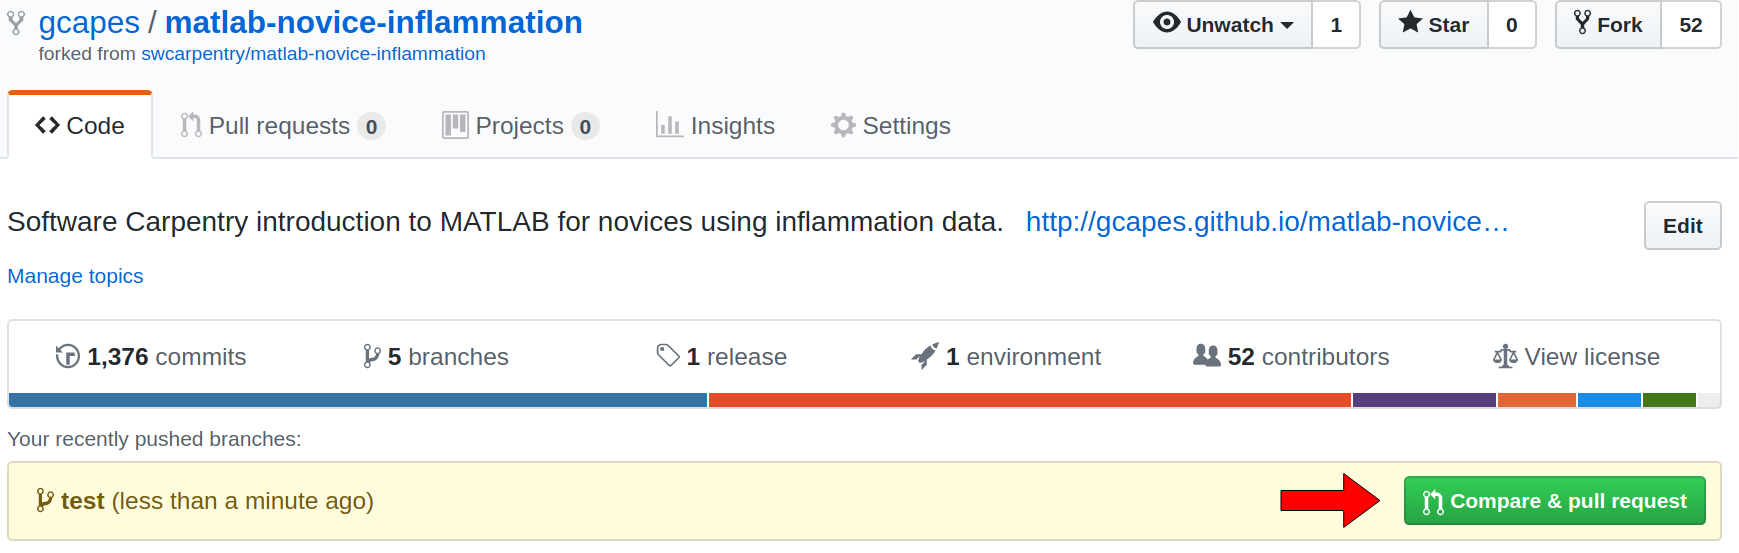
If you don’t see this on your GitHub repo’s page, go to the Carpentries’ lesson repo and go to the pull requests tab. Select your feature branch, and follow the instructions!
The whole PR process is summarised in the diagram below:

File structure used for lessons
So you have an idea of something you want to change in a Carpentries lesson. Which files do you need to edit?
The Carpentries lessons all use the same structure.
Markdown files are combined with images and css to create the webpage served on GitHub.
The home page is created from index.md in the root directory, and setup.md creates the setup page.
Episode content is stored in _episodes and is what you would typically edit in a PR.
Note that for lessons which use R, you should edit the files in _episodes_rmd instead of those in _episodes.
Markdown files make use of special blockquotes to create the coloured boxes used for exercises, callouts, keypoints etc.
Syntax highlighting of code blocks is available and should be used whenever possible.
Local preview using Jekyll
While not always necessary, it’s a good idea to preview your changes locally before committing and making a PR. This way you can be sure that your intended changes render correctly.
The lesson web sites are built using Jekyll, so you’ll need to install Jekyll to build the site locally.
Once you have made your changes, run jekyll serve from the root directory of the lesson repository.
The site will be built locally and can be viewed at http://127.0.0.1:4000.
Build a site locally using Jekyll
- Fork this repository.
- Clone your forked repo to your laptop
- Build this lesson’s website locally using Jekyll
Solution
$ git clone https://github.com/your-user-name/swc-pr-tutorial
$ cd swc-pr-tutorial
$ jekyll serve
View the site at http://127.0.0.1:4000
Send a pull request to this repo
Overview
This exercise uses your fork from the previous exercise. You should already have cloned your fork to your laptop. Please fix this issue with your pull request by adding some text to the discussion page (under the extras drop-down menu).
Instructions
- Check out a new feature branch for your changes
- Make changes to the required file
- Preview changes locally using
jekyll serve- Commit changes to the new feature branch
- Push your feature branch to origin
- Go to your repo on GitHub and submit a PR from your new feature branch
Solution
$ git checkout -b feature-branch    # Make your edits in a new branch
$ jekyll serve                      # Check that your changes render correctly
$ git add file-that-you-changed.md  # Stage your changes
$ git commit                        # Commit your changes
$ git push origin feature-branch    # Push your changes to origin (your fork)
Submit your pull request using GitHub — this can be done either from your repo’s page or the repo which you cloned.
Key Points
Pull requests allow collaboration on a repo where you don’t have push access
A pull request is a request to merge commits from your fork into the original repo
Edit markdown files in the root directory,
_episodes(_episodes_rmdfor R lessons), or_extrasEdit figures in the
figdirectoryJekyll is used to build the site (locally and on GitHub)